Manual Exposure
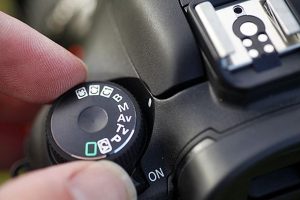 Manual exposure will keep your footage brightness from changing as you move the camera and will allow you to precisely control how bright or dark you want to show what’s in front of your lens. Turn your camera dial to manual exposure (M on most cameras) to control both the aperture and shutter speed simultaneously. If you don’t want to use full Manual exposure, set your camera dial to Shutter Priority so that your frame rate does not change during filming, then use exposure compensation to adjust image brightness if the camera’s light meter is getting hoodwinked.
Aperture
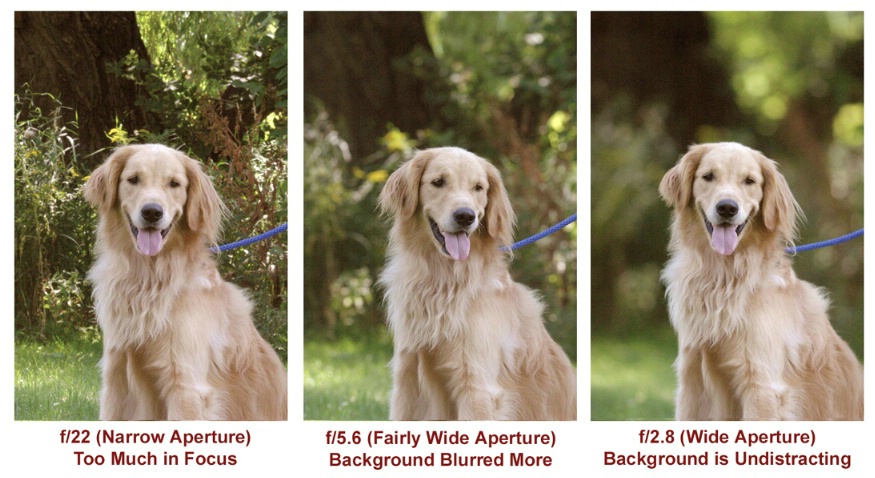
To achieve cinematic video footage, this is probably the most important camera setting after the length of your lens and the frame rate. Without an aperture of f/8 or faster (f/5.6, f/4, f/2.8), your DSLR footage will probably look like it came out of a lesser-grade camcorder because everything will appear to be in focus. If your camera will not let you properly expose the image at f/5.6 or f/4, then buy a 6 or 8 stop Neutral Density Filter for your lens and use it when filming in sunshine or party sunny days.
Shutter speed
Another important aspect of smooth-looking video footage is to set the right shutter speed. Unless you are shooting fast moving objects, set your shutter speed to double your frame rate. For 24 frames per second, set your shutter speed to 1/48th or 1/50th of a second. If you’re shooting at 30 FPS, set your shutter speed to 1/60th of second to capture smooth, natural looking footage. Higher shutter speeds should be reserved for extreme sports or if you want to get the choppy fight-scene look.

Framerate
For most videography, 24 frames per second looks smoother, more cinematic, and less like camcorder footage. Most older camcorders record at 30 FPS. Unless you’re shooting for a TV commercial or intentionally shooting slow-motion clips, 24 FPS is usually the best option to use. GoPros and some other adventure cameras now support 24 FPS. If filming the same scene with multiple cameras, make sure they are all set to the same framerate.
ISO
ISO represents the light sensitivity of your camera’s sensor. For daylight (outdoor) footage, set your ISO to either 100 or 200. If you plan on doing a lot of outdoor filming, best to buy a 6 or 8 stop ND (Neutral Density) filter to block some light so you can use cinematic aperture settings. In the days of 35mm film that you bought in the store, most films were 100, 200, or 400 speed. The higher the speed, the more light sensitivity, but the more grain or noise your image will have. Full-frame DSLRs shoot the best quality at higher ISOs, but crop-sensor cameras made since about 2012 can capture acceptable images at ISO settings over 1000.
Pocket Guide to Aperture, Shutter Speed, and ISO
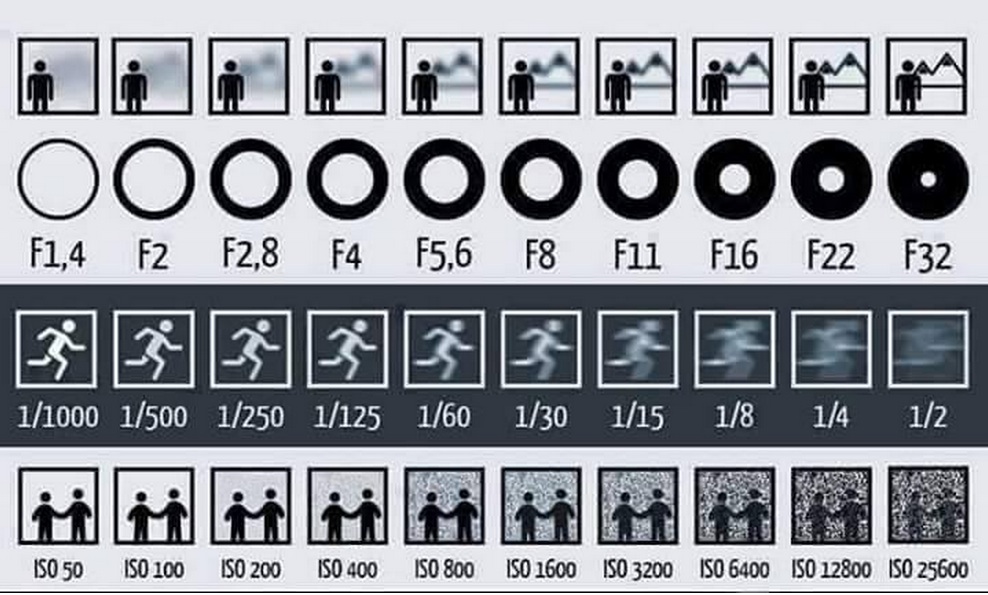
(Click to see full size image.)
Other camera settings to consider when filming
Image Stabilization
Depending on your brand of camera and lenses, you may already have image stabilization available. Turn on image stabilization whenever possible to get smoother footage when hand-holding the camera.
Sound Levels
Record audio with an external recorder whenever possible to get the best quality sound. Set your camera’s built-in mic to a level loud enough that you can easily sync with professional external audio files later.